

In this tutorial, we start from scratch and build, pattern by pattern, a solid rhythmic vocabulary. Each diagram reads from left to right: the numbers represent the beats, and the & symbol (“and“) represents the eighth note between two beats.
How to read the diagrams
Four symbols come up throughout the article:
- Down arrow → a downstroke with the pick (or fingers) toward the floor, from the low strings to the high strings.
- Up arrow → an upstroke, from the high strings to the low strings.
- Cross → a muted strum: your hand hits the strings without letting them ring, for a percussive effect.
- Gray dot → a rest: your hand keeps moving through the air but doesn’t touch the strings.
The hand motion itself never stops: even on beats where you don’t play, your arm keeps swinging like a human metronome. It’s this continuous motion that gives you a steady tempo.
Pattern 1 — The foundations: downstrokes only
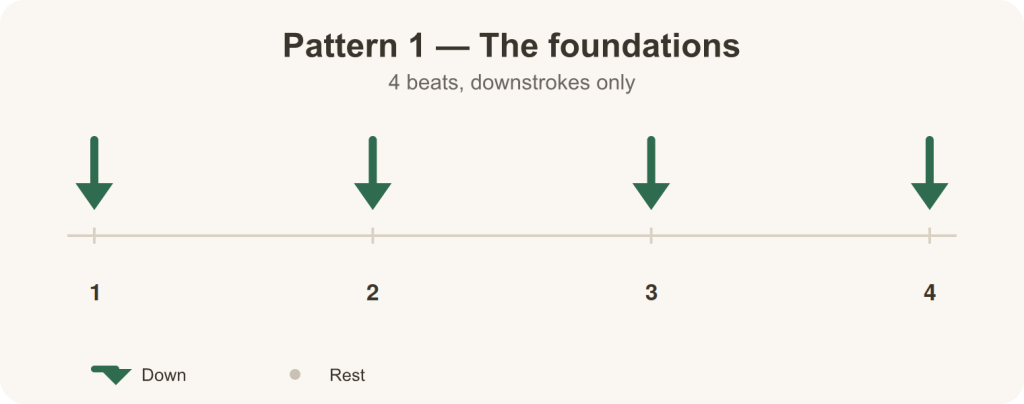
We start simple: one downstroke on each beat. The goal here isn’t speed but consistency. Set a metronome to 60 BPM and play this pattern on an open chord (C, G, D…) until your arm moves without you thinking about it.
What it teaches you: to sync your fretting hand’s chord change with beat 1, and to keep a steady tempo without speeding up or slowing down.
Pattern 2 — Alternating down/up

This is the most important pattern of all, because it’s the basis for almost everything else. The rule is simple and never changes: the downbeats (1, 2, 3, 4) are played down, and the eighth notes in between (the “&s”) are played up.
Even later, when you skip some strokes, your arm will silently keep up this down-up-down-up motion. It’s called the “windmill”: your hand never stops, it either hits the strings or passes over them.
What it teaches you: to separate the arm motion (constant) from striking the strings (variable).
Pattern 3 — The universal classic: D D U U D U
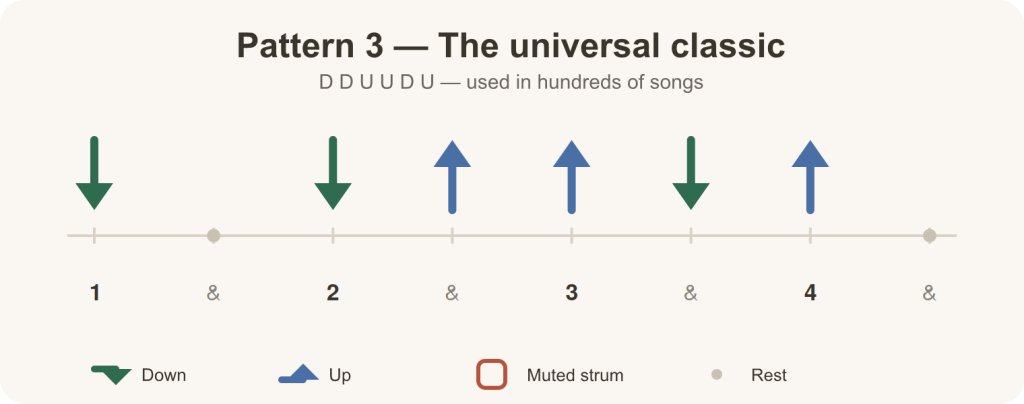
This is probably the most widely used strumming pattern in pop, folk and rock over the last 60 years. It fits in one phrase: down, down, up, up, down, up, with two rests (on the “&” of 1 and on beat 3).
The difficulty isn’t in the strokes you play but in the rests: your arm has to keep up its windmill motion without touching the strings on those two beats. That’s often where beginners tense up.
Practice tip: first play Pattern 2 continuously, then simply “remove” the two strokes in question while keeping your arm moving. You get Pattern 3 without having to learn a new one.
Pattern 4 — Introducing the muted strum (muting)
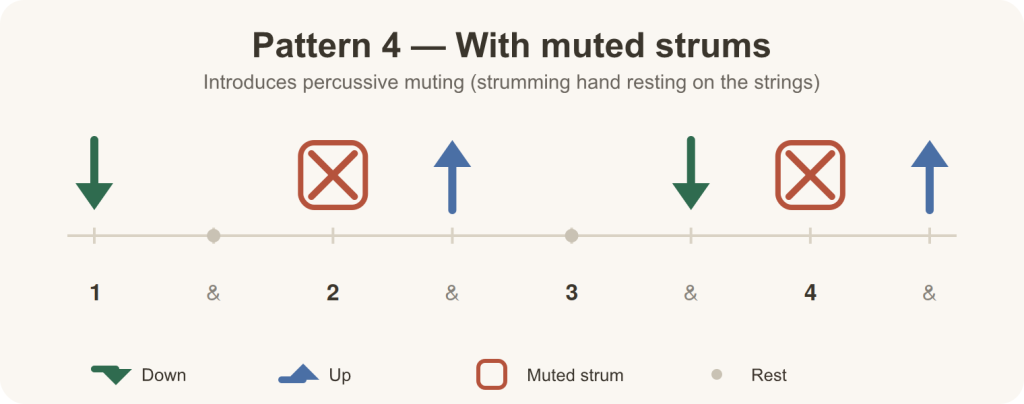
Once the windmill is well established, you can add a rhythmic ingredient widely used in funk, reggae and today’s pop: the muted strum. Your fretting hand slightly releases pressure on the strings (or your strumming hand rests its edge on the strings) to turn a stroke into a percussive “chuck” rather than a ringing chord.
This pattern requires coordination between both hands: your fretting hand has to release and then reapply pressure exactly in time with the strum.
What it teaches you: to use the guitar as both a harmonic and a percussive instrument, a key skill for accompanying a singer or playing solo.
Pattern 5 — The waltz: three-four time (3/4)
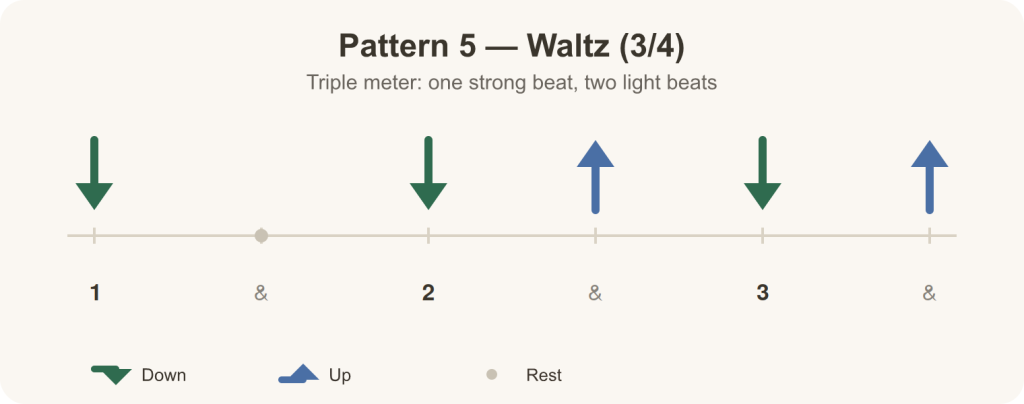
All the previous patterns were in 4/4 (four beats per bar). The waltz works differently: it’s counted in 3 beats, with a strong beat followed by two lighter ones (“BOOM-chick-chick”).
This pattern breaks the habits you may have picked up with four-beat rhythms; it’s an excellent test to check that your sense of rhythm doesn’t depend on a single time signature.
What it teaches you: to adapt to different time signatures, an essential skill as soon as you move beyond the most standard songs.
How to practice these patterns effectively
- Start without your fretting hand: practice each pattern on open strings, or by tapping on your thighs, before combining it with chord changes.
- Always use a metronome, at a slow tempo (50–70 BPM to start), and only increase the speed once the pattern is completely automatic.
- Don’t skip steps: each pattern in this list builds on the previous one. A shaky Pattern 3 almost always comes from a Pattern 2 that isn’t well enough ingrained.
- Record yourself from time to time: your ear often catches irregularities your hand doesn’t feel.
If you want to practice these patterns with a built-in metronome and see the chords you’re using in real time, you can combine them with the Guitar-Trainer tools to lock your strumming to a precise tempo.
Leave a Reply
You must be logged in to post a comment.